I have an unpopular opinion to share: Public transit is fantastic. I’ll back up a step, perhaps: Duluth has fantastic public transit. I was fortunate enough to live more or less midway between downtown and campus, close to a bus stop, for the duration of my time in Duluth, so there were several frequent buses that would take me directly to anywhere I’d frequently go.
The Duluth Transit Authority clearly puts effort into making helpful information available online—if anyone from the DTA is reading this, please give whatever web dev you hired on during Summer 2019 a raise!—and it’s not lost on me. However, the 60 seconds it takes to pull out a phone and go to the DTA’s mobile bus tracker to check the next bus ironically made me miss a bus by 30 seconds more than once. What I really would have liked, I figured, was a display like this one1 that the DTA has at some of their larger stops. However, that seemed cost-probhibitive, so I started exploring what else I could do. What would I want, I reasoned, if I could have any kind of display? Well, a map seemed logical. So began a nearly two year journey towards my final design.
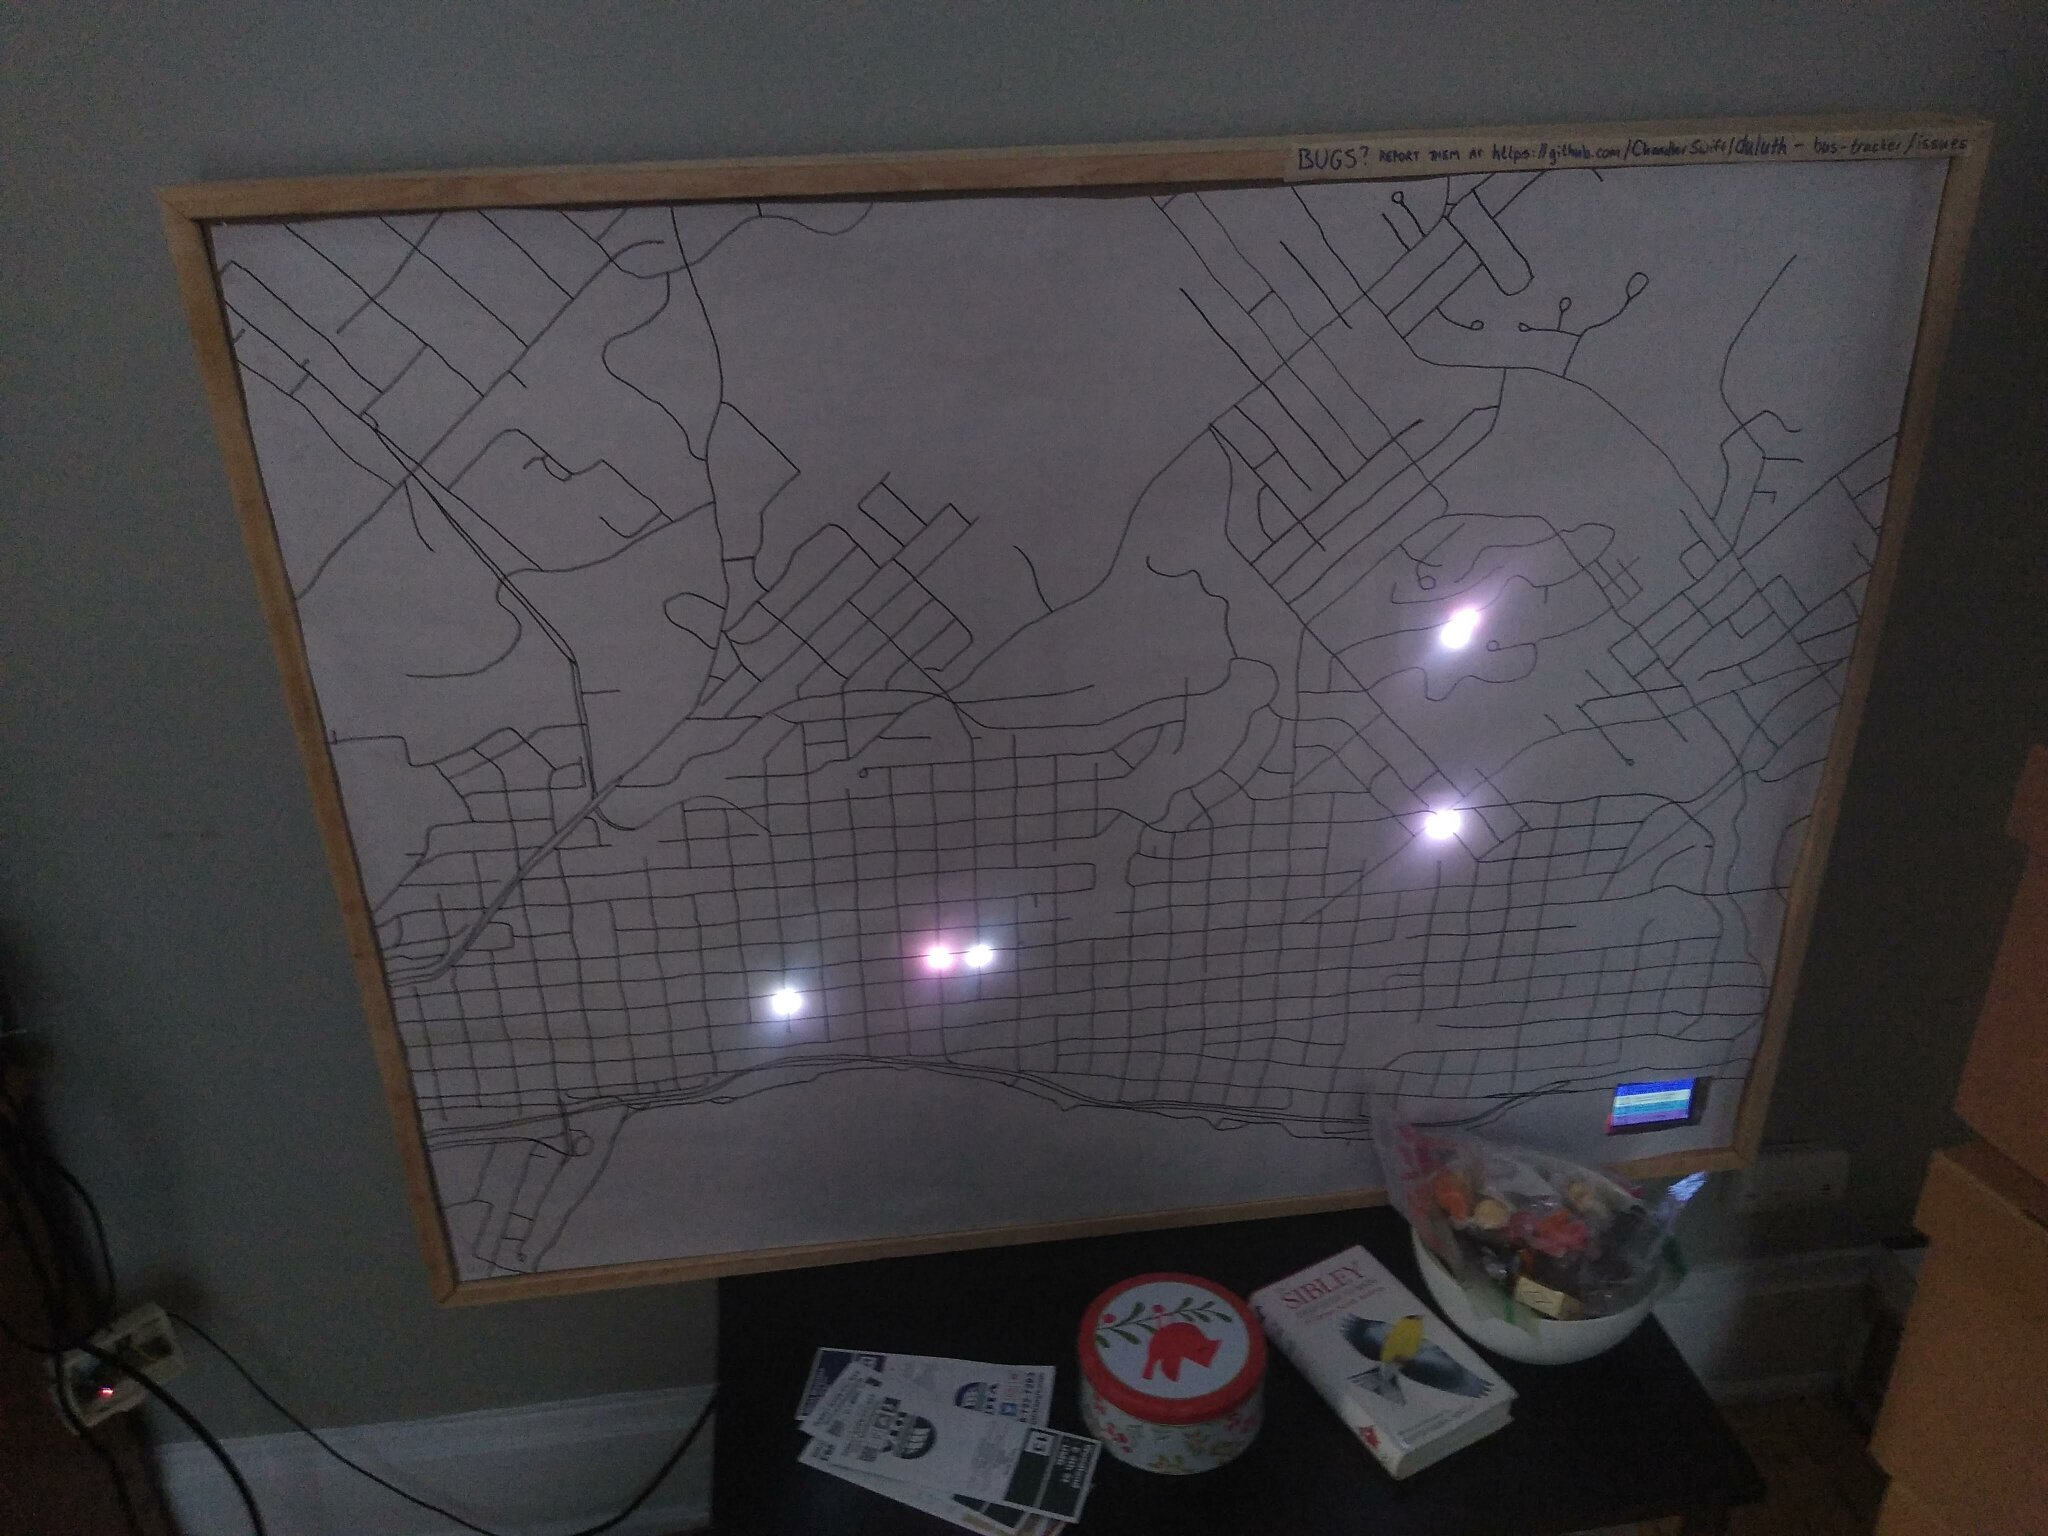
Starting from the end, here’s the final product (and the
source code):

That’s a paper map with cardboard backing. Through the cardboard (but not the paper), I cut holes for the LEDs2, and placed an RGB LED at each intersection with a bus stop on a route I was tracking, and then mapped the LEDs to the stops in software3.
Tracing the map was relatively easy; UMD’s ACM Club has a nice high resolution projector that projects onto a whiteboard, so I just taped some large format paper to the board, fired up Maperitive to generate some custom maps (their green wireframe maps had a good combination of data and contrast for me) and traced!
I went through several iterations on the display. At first, because I don’t like using high-power devices when much simpler processors will do the trick, I was using an ESP8266 as a controller. However, this meant that I wasn’t able to do live code updates and debugging on the controller, and that I would have to precompile all the routes into software rather than loading them dynamically4. This left me unimpressed, so I switched over to a Raspberry Pi 2B+. With enough power to run a proper display rather than a 16 character LCD, I rethought my UI and landed on this:
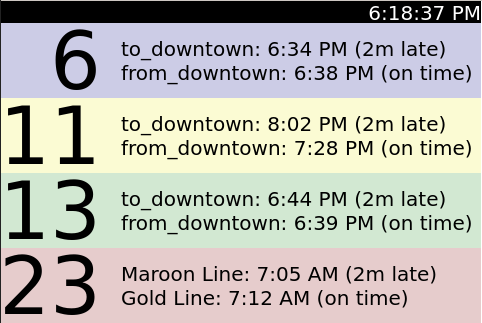
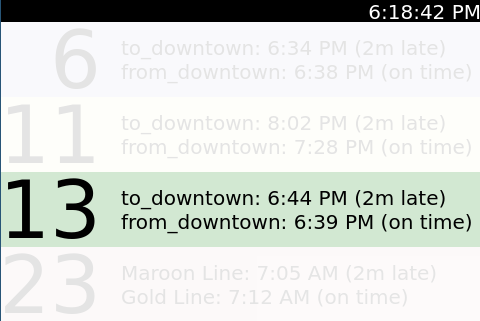
The first image is the usual view, with information of all 4 routes that run near me (living on 4th St, the #13 and #23 passed right by my door, and the #6 and #11 were four and five blocks’ walk, respectively). Selecting a route highlights its stops, and displays only the buses from that route. Also, while it’s washed out in many of the photos, the buses are colored using the DTA’s colors, which are printed on the route maps and also provided via the API! Here’s a demo of route selection on an early demo of the map:
I didn’t get many interesting photos of the work in progress, but here are a few highlights:
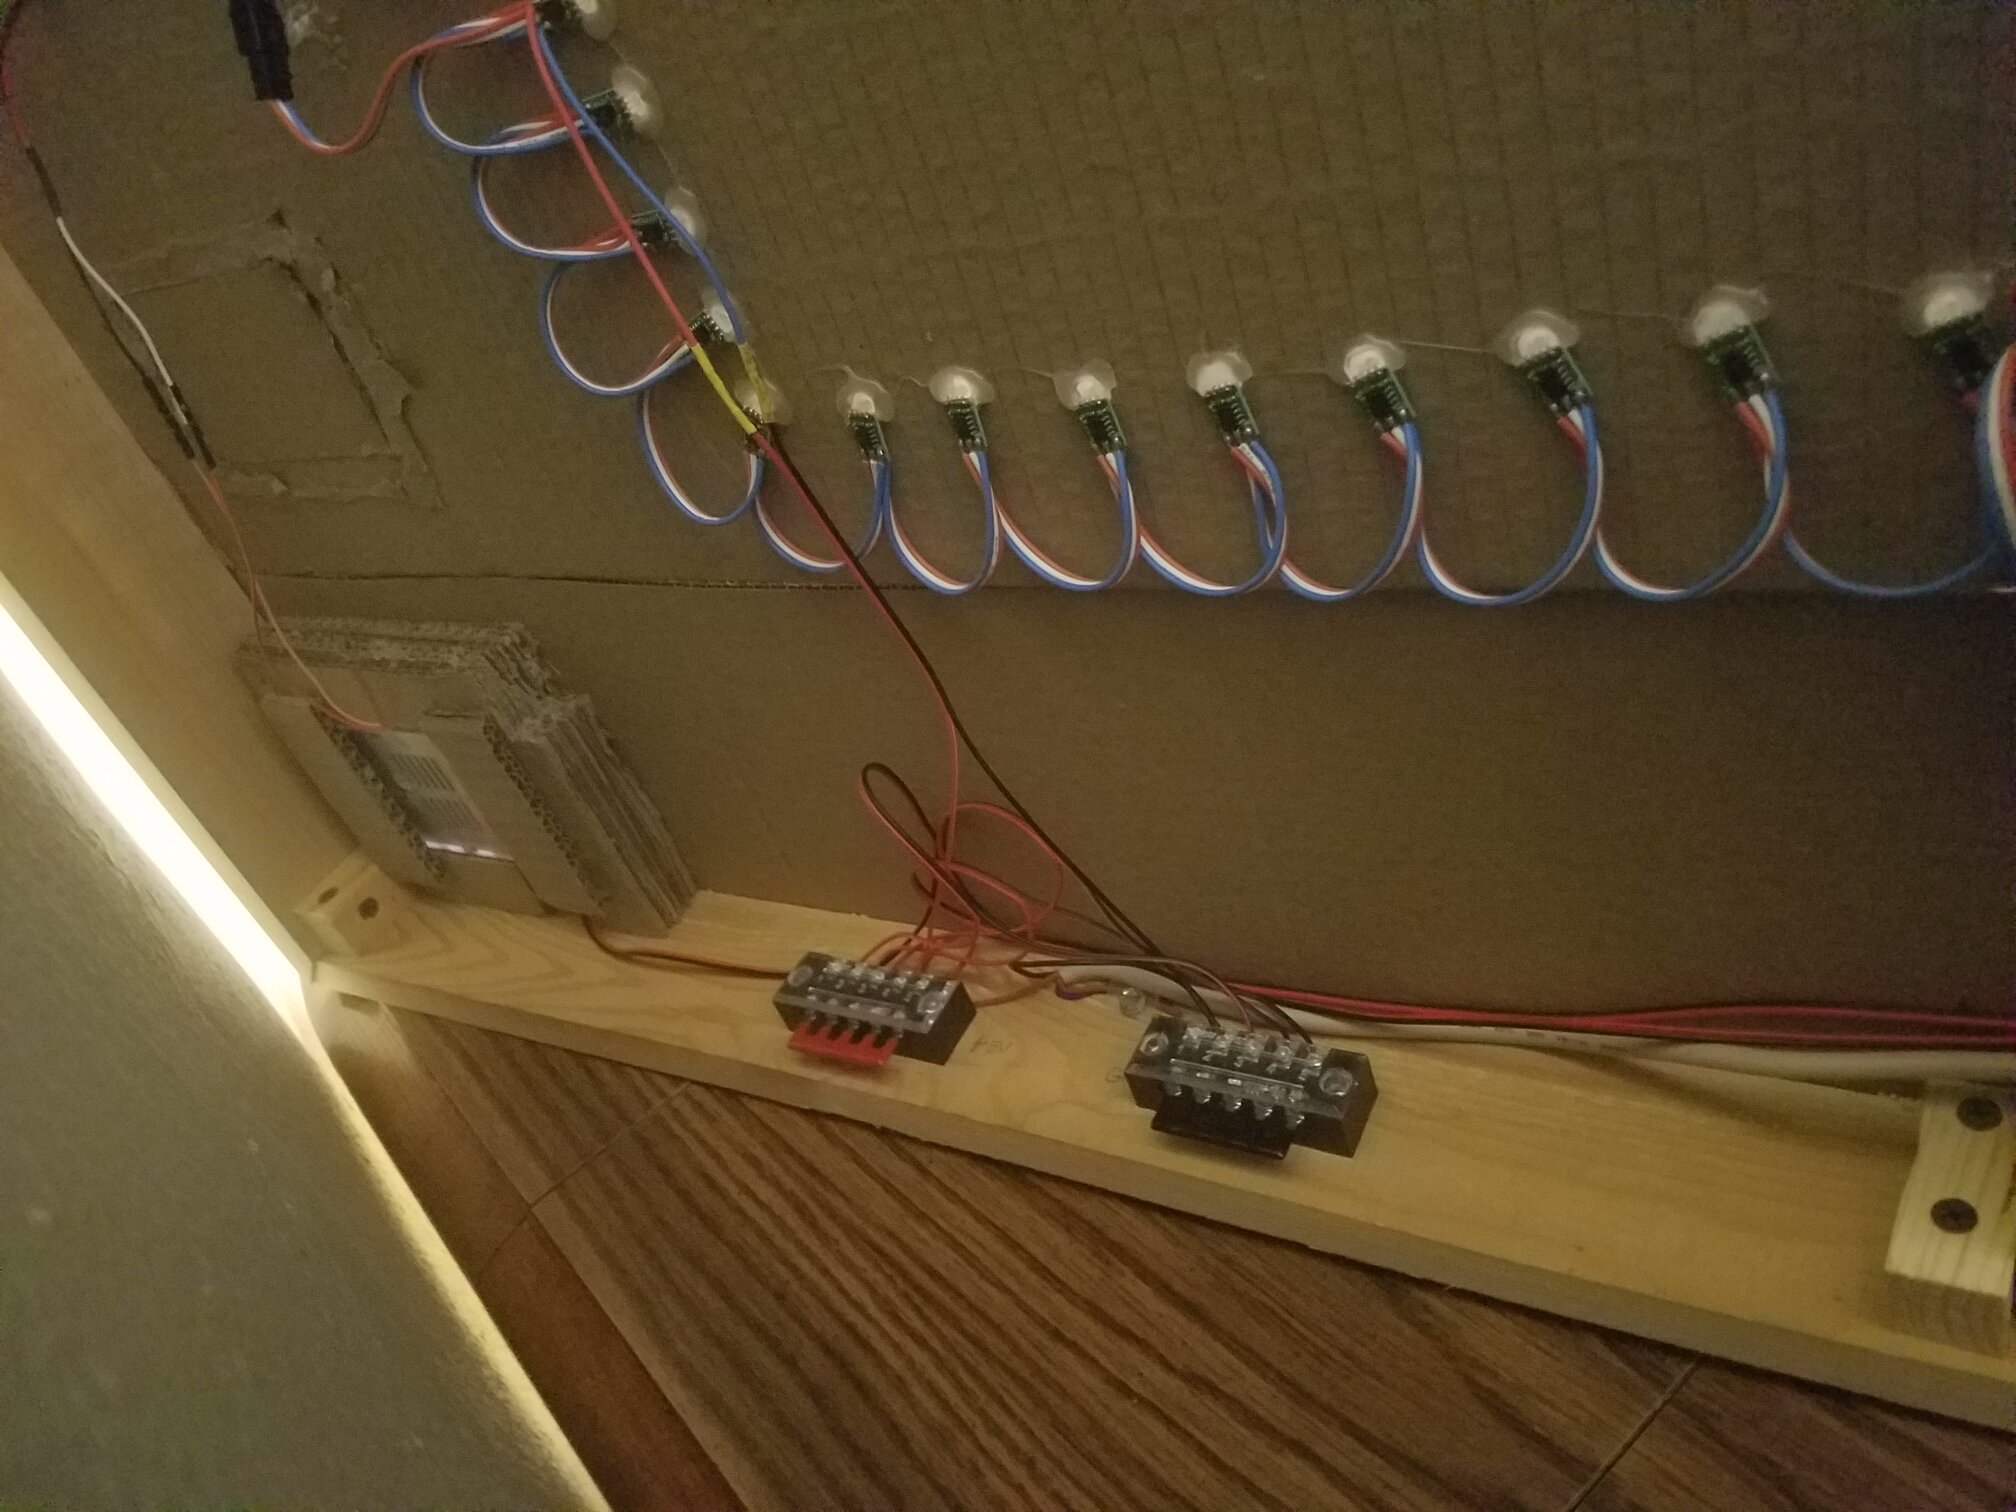
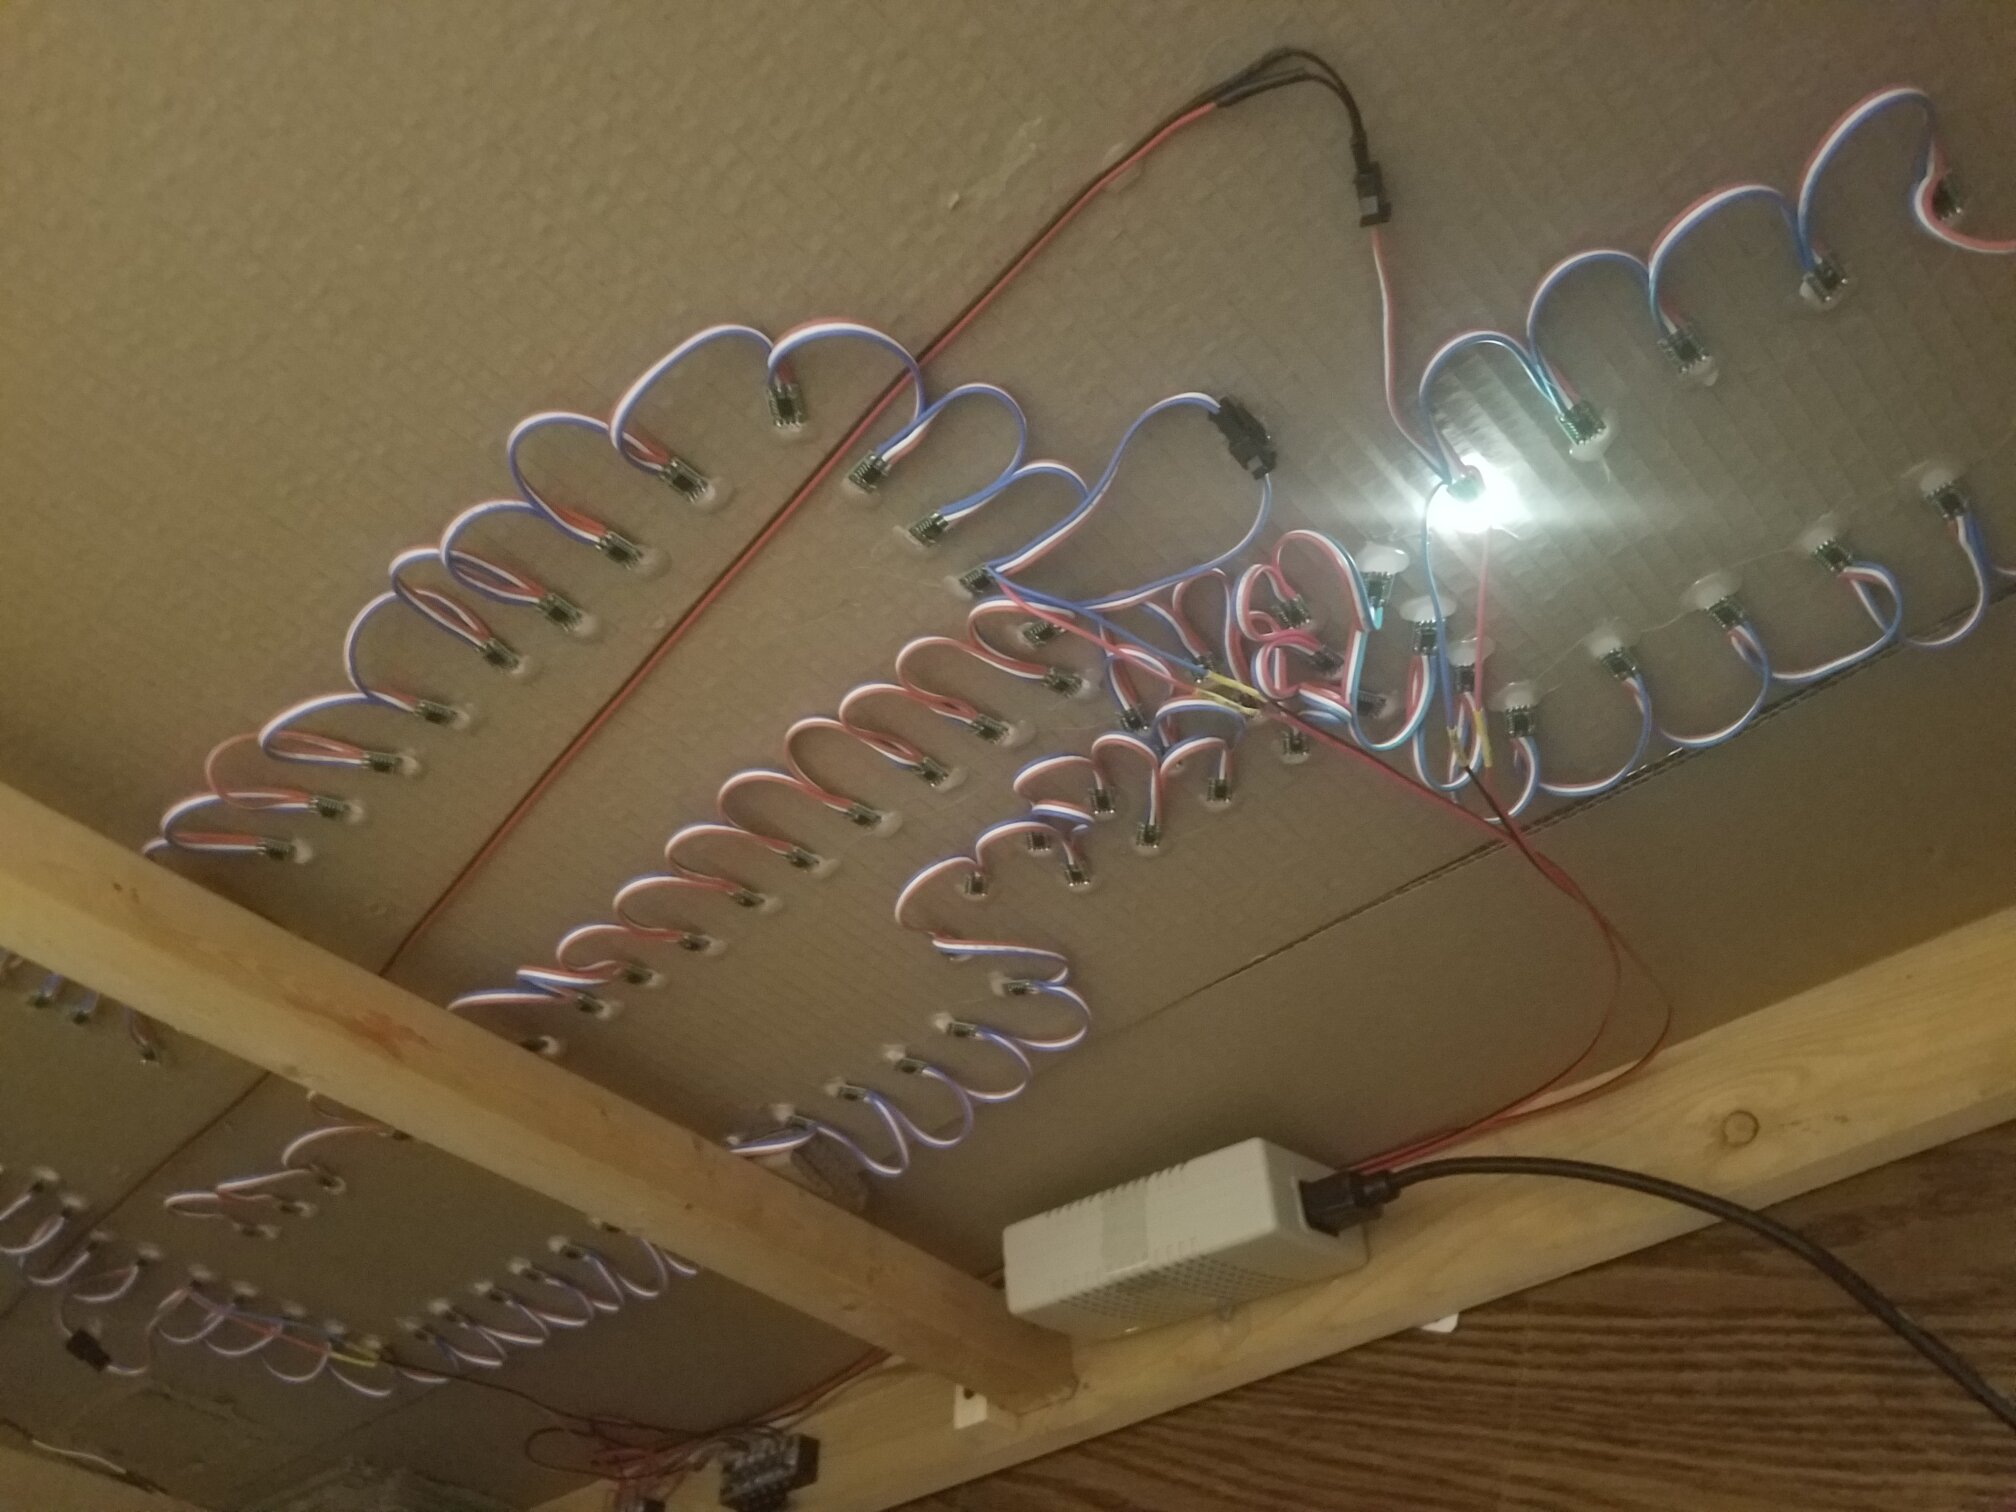

Any other photos I took are available at in the album at https://photos.app.goo.gl/oMXnoJ3bG1ESuEWR6].
-
While I was looking for this photo, I found a lot of relatively uninteresting shots of generic DTA buses by the Duluth News Tribune, a few more interesting shots of the insides of buses or special events and similar, and, finally, this guy. Man, I thought I was a public transit enthusiast, but this guy puts me to shame. He also has a blog that pretty effectively nerd sniped me for a good chunk of time that I was planning on using to write this post! He also provided a link to nerd snipe #2: the Minnesota DOT’s Annual Transit Report, which is an embarrassingly interesting read.
Particularly of interest was the DTA #601, built in 1951 with some snazzy interior shots as well! ↩︎
-
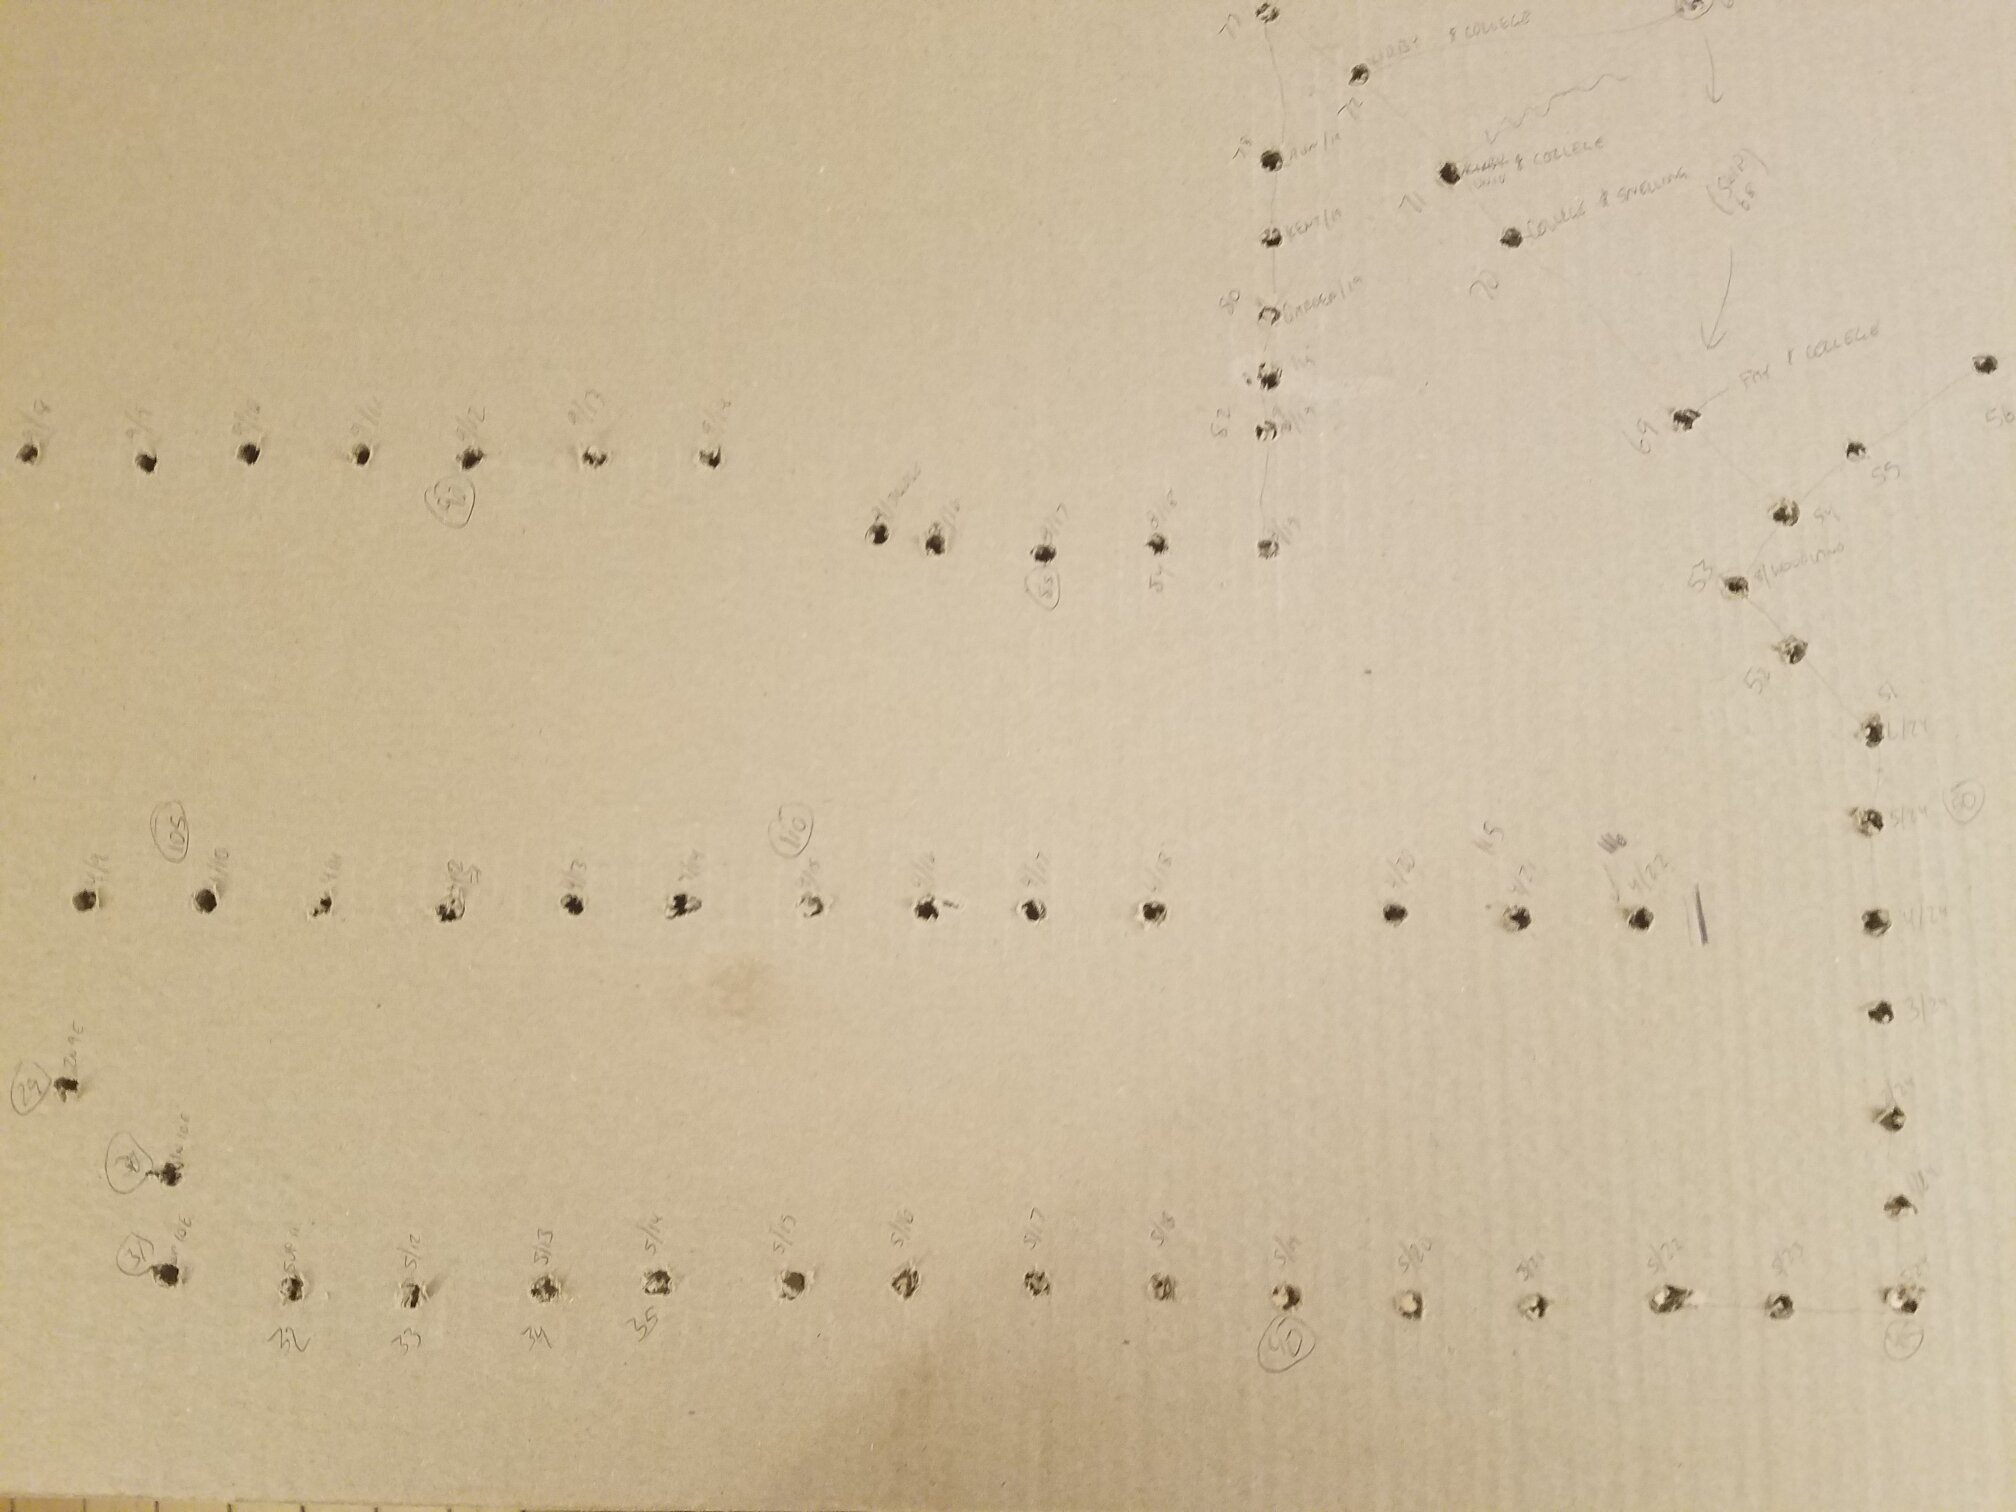
To make these holes, I used a needle as a pseudo-center punch, punched through the map, and then removed the map and used a 1/4" drill bit—the LEDs were slightly larger than 1/4" so they friction fit nicely—to make a reasonably clean hole through the cardboard. ↩︎
-
For listing stops in order, it’s not too complex to do just by looking at the CSV lists of stops along a route, but to deduplicate them, I ended up using a script and a fair bit of manual labor; I numbered each LED as I put it on the map, so the script finds a stop (say, “Kirby Plaza - C”, “Duluth Transit Center”, or “12th AE and 4th St”, where I lived.) Overall, this step of mapping LEDs to stops probably took an hour or so, but that’s substantially better than the half-dozen hours of finding and tracing maps, or several hours punching and drilling the map! ↩︎
-
While I’d much rather be able to download these directly from the device, and preferably on-demand, space constraints win out here. The routes file was a few megabytes; the ESP8266 has, usually, 1MB of RAM—it simply wasn’t going to fit. ↩︎

.jpg)